Wednesday, May 30, 2012

Cooking With Cricut May Flowers Challenge

Today the challenge at Cooking with Cricut is "May Flowers" - it's such a versatile challenge I think we'll see lots of different projects this week which is exciting!

This weekend we are having a big " birthday bash" for my kids and my niece and nephew. They all have birthdays within a month of each other so we get the whole family together and celebrate all four at once. The theme this year is "Luau".

I used Mother's Day Bouquet and created the lei for my daughter:


Each flower is cut at 2 inches. At first I just had them flat, but realized it didn't look "real" at all. So, I scored each petal and folded it up slightly. I used one of my cricut tools to poke a hole in the center and threaded it with pink twine.


Head over to Cooking with Cricut and post your project with flowers on it. We'd love to see what you create!

Thursday, May 24, 2012

Cooking with Cricut BLOG-AVERSARY


Welcome to Paper Crafting World and Cooking With Cricut's 2nd Blog-Aversary and our week long celebration! Each day for a whole week (May 19-26) we will be brining you fabulous projects made by our Design Team members. We have some GREAT blog candy as well as some daily file and graphic give-aways -- so you will definitely want to make PCW-CWC your daily stop every day this week!

Our theme for today is . . . Crowns/Tiaras and this is what I created!


My husband and I are very proudly raising little nerds. My seven year old is a self-proclaimed bookworm and loves everything about the local library. She has been begging for library cards for her own books.


I used Once Upon a Princess and my Gypsy for all the cuts.

For the pink envelope I cut the tag and rather than using it as a tag I scored the edges, folded and glued.
Cut at 2.25" then embossed on  big kick

Scored the sides and bottom


Crown cut on Gypsy with width 2" and height 1.5" (not original proportions).
I also had to hide the contour lines so they weren't cut.
Words printed in size 12 and 14 font. Font name: "KG Ray of Sunshine"
Rectangle cut with paper trimmer 2.25" x 3.5"
Crown cut 1" height (used gypsy to line them up where I wanted them)
Small pink oval cut and glued to back of card behind the crown.


Thanks for stopping by and make sure you head on over to Cooking With Cricut to check out the rest of the projects by our amazing Design Teams!


Friday, May 11, 2012

Thanks A Latte Starbucks Cupcakes for our favorite preschool teacher!


It's Teacher Appreciation Week and this is the gift for our fabulous neighbor who happens to be my son's preschool teacher. I saw these frappucino cupcakes on pinterest a while back and have been waiting for an occassion to make them!

chocolate cupcakes with vanilla frosting and drizzle of caramel

I made the cupcakes from scratch. The last time I tried to make cupcakes from scratch was a total flop, but these turned out A-Mazing if I do say so myself.  The receipe came from food netowork.com and can be found here.

To go along with it I made a card that says "Thanks a Latte".  I used the sketch inspiration at Freshly Made Sketches to design the card and have entered it in the challenge over there.

I used the backside of a starbucks cardboard cup cozy

The cuts are from Kate's ABCs (great fonts on that cartridge!)
I used glue dots to seal the bottof of the cup cozy to create an envelope.
I slipped a starbucks gift card into this little envelope and my son signed it.


Wednesday, May 9, 2012

Happy Mother's Day (Cooking With Cricut Challenge #85)

Growing up my parents didn't have a lot of money, but I never knew that until I was an adult. I never thought of ourselves as any less wealthy than any of my friends and probably took a lot of things for granted. One of these things is a trip I took to England in high school. My parents paid for my sisters and I each to go to Europe with our classes, a financial burden I am sure (one which, at the age of 17, I didn't quite comprehend). I think the most amazing part is that my mom is a history lover who would probably love nothing more than to visit Ireland where her ancestors are from. However, my mother has never been overseas. Instead, she has sent her children there to travel, to learn, and to have an experience she herself has never had. While I was in England I remember thinking "my mom needs to come here". I saw so much art, history, and culture on that trip and all I could think was how much my mom would love it. I certainly hope one day she gets to take this trip herself.

While in England I was so amazed by the art and architecture we saw there. My favorite pieces were old mosaics we saw in some old buildings. I could stand and stare at the mosaics for hours. The work and vision that went into creating these pieces literally took my breath away.

Jump forward 10 years. I am now an adult, married, living in the midwest while my parents are living in Maine. My daughter has just been born and my mother can't stay away! She flew out to Missouri to be there at the birth and stayed with us for quite some time. She came out for a month each summer for the next few years to visit and help us out. On one of these trips she asked me to go along with her to this lecture being put on my a quilt book author. My mom is a quilter and I really want to be one (but my short temper, absolute perfectionism, and lack of patience do not add up to a successful experience with this). I went along with her, though, and it remains one of those things I am so glad I did. It is truly one of my fondest memories I have with my mom. At the end of the talk my mom purchased me a copy of the book. I've held onto it ever since, determined that one day I WILL make a quilt for her out of the book.

Well, that day has come (sort of). I know I can't sew her a quilt. Not yet. But, I am pretty crafty with paper and glue, so I decided to make her a paper mosaic quilt. I took a pattern from the book she bought me and created her this:

This is an 8x10 mosaic made from 640 triangles. (Every piece on this is a triangle!) The triangles are 1/2" cuts (To get the right angled triangle I used the "corner" feature on Straight From the Nest)

Here's a little look at what it took to make this :
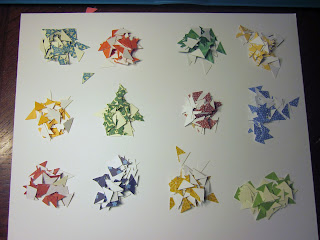
All the colors I was using lined up in the order they would be on the finished project.

Soooo many white triangles! (And I actually ran out!)


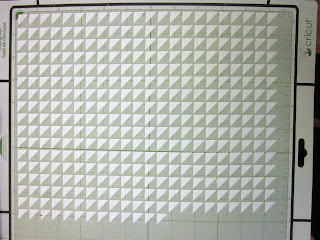
 I used this piece of paper as a guide for gluing them down. In retrospect I wish I had drawn my lines a lot lighter, as I see parts of it show through in the finished product. (I actually considered redoing it, but talked sense into myself and left well enough alone).


Here is a picture of it out of the frame:


I was thinking a set of greeting cards made in different quilt block patterns would be phenomenal (it might be my next project!).

Thanks for checking out my project today. If you have something special (not a card!) that you have made for your mom please head over to Cooking With Cricut and link your project up to our challenge. We'd love to see what you came up with!

(And here's to hoping my mom doesn't read my blog since she won't get this gift til Sunday!)

I will be entering this project into a few other challenges as well.

1. Inspired by Rainbow Colors (at Creative Inspirations Paint)
2. Mother's Day at Fantabulous Cricut
3. Mother's Day at Exploring Cricut

Wednesday, May 2, 2012

Cooking With Cricut Challenge #84 Teacher Appreciation Day

Last year for Teacher Appreciation Day I made a "Bouquet of Freshly Sharpened Pencils" and it was a big hit among my crafty friends and my daughter's teacher. So I thought I would stick with what works and make one again this year. I did go into a bit more detail this year, though. I had a very pretty bouquet finished when my six-year old told me it looked more like a baby shower bouquet than a teacher bouquet and asked for brighter colors.

This is a very quick, very inexpensive gift idea. The flowers are cut from Mother's Day Bouquet (as are the leaves and circles). The flowers and leaves are cut at 2" and the pink center circles are cut at .75". Simply cut the shapes. Adhere the pink dot to the center. Using a hole punch, make a hole in the center of the flower and stick the pencil eraser through. So simple!

The supplies for this project cost me $5: The bucket is from the dollar bin at Target, 2 packages of pencils, and a piece of foam from the floral section at the craft store.  (This year I stocked up on these $1 pails since I have so many different ideas of how to use them!)

The stamps is from a great set of teacher stamps that I bought from www.papertreyink.com


Head over to Cooking With Cricut and show us what you have concocted for the teachers in your lives! Coming from a family of teachers I can tell you how much they appreciate simple gifts when they come with a personal card with kind words showing that you do appreciate the love and energy the pour into your child!

I am also entering this into a coulpe of other challenge:

Sunday, April 22, 2012

Cooking with Cricut Home Decor Hop

Welcome to Paper Crafting World and Cooking With Cricut’s Home Décor Blog Hop!  Our Design Teams are so excited to bring you a two-day hop that focuses on projects for your home – that’s right no cards or scrapbook layouts in this hop!  You should have arrived here from visiting Court at Court's Craft Corner.  If you’ve joined us in mid-Hop and would like to check out all the other fantastic projects head on over to Melinda’s Paper Crafting World   (http://www.cookingwithcricut.com) and start at the beginning.

For this hop I had so many different ideas of what I wanted to make, but landed on the one I actually NEEDED at my house - a way to keep my family organized. I spend a lot (probably too much) time on Pinterest and have been looking at how other moms seem to keep it together. I have adapted all the projects I have seen to come up with this for my family.


Here it is in use:

It was pretty easy to make and I love how it looks (and I hope I keep more organized with it!)

I bought the white board for about $10 at Target and bought a roll of their paper tape (found in the bulletin board section with all the magnets and tacks). I used the tape to mark out different sections on the board. The pad of paper is from teh dollar bin at Target as well (I bought several of the same one because I like how it matches, lol). 

The menu portion is a take on a system I had already been using. All of our meal ideas are written on the turquoise tabs. (These are cut from the Wild Card cartridge).  Using magnets I just put up all of our meals for the week right on the board. (The days of the week are circles from Cricut Classic Font, flowers from Mothers Day Bouquet and letters from Calligraphy Collection).
 All of the tabs are stored in these cute little envelopes (also from the Wild Card Cartridge). I have seen people use many different categories to sort their meals. I work in the evening, so my husband has to cook several days a week so I have to sort them by who is cooking (his skills in the kitchen are limited, shall we say!) I used Calligraphy Collection for the labels (on my gypsy, welded the letters together).


I am also a couponer (not extreme by any sense of the word, but I shop at a few different stores each week and have piles of coupons around the house pulled out for when I shop. So, I added a coupon section to my board. There is a heavy duty magnet for each of the major stores I shop at so i can pull coupons from my coupon filer and put them up on the board to grab before I head out shopping. The cut is from Mother's Day Bouquet and I just hand-wrote in the name of the stores on them.


All the words on this board are typed from Calligraphy Collection and I used my Gypsy to weld he letters together.


We hope you’ll link up your Home Décor project for a chance at winning one of our giveaways.  One winner will be chosen by random draw and three others will be selected by the Design Team.  Head on over to Cooking With Cricut  (http://www.cookingwithcricut.com) for the guidelines and the link up. 


Thanks for stopping by!  Head on over and check out what Jamie L. at Scrappin' 2 Baby Girls has cooked up!

Saturday, April 21, 2012

Cooking with Cricut Home Decor Blog Hop

Cooking with Cricut is having a two day home decor blog hop and lots of blog candy can be found both at cooking with cricut and on some of the posts in the hop.

This is a two day hop that started this morning.

Head over to Cooking with Cricut to check out today's projects and be sure to come back tomorrow to see what I cooked up for tomorrow's hop!